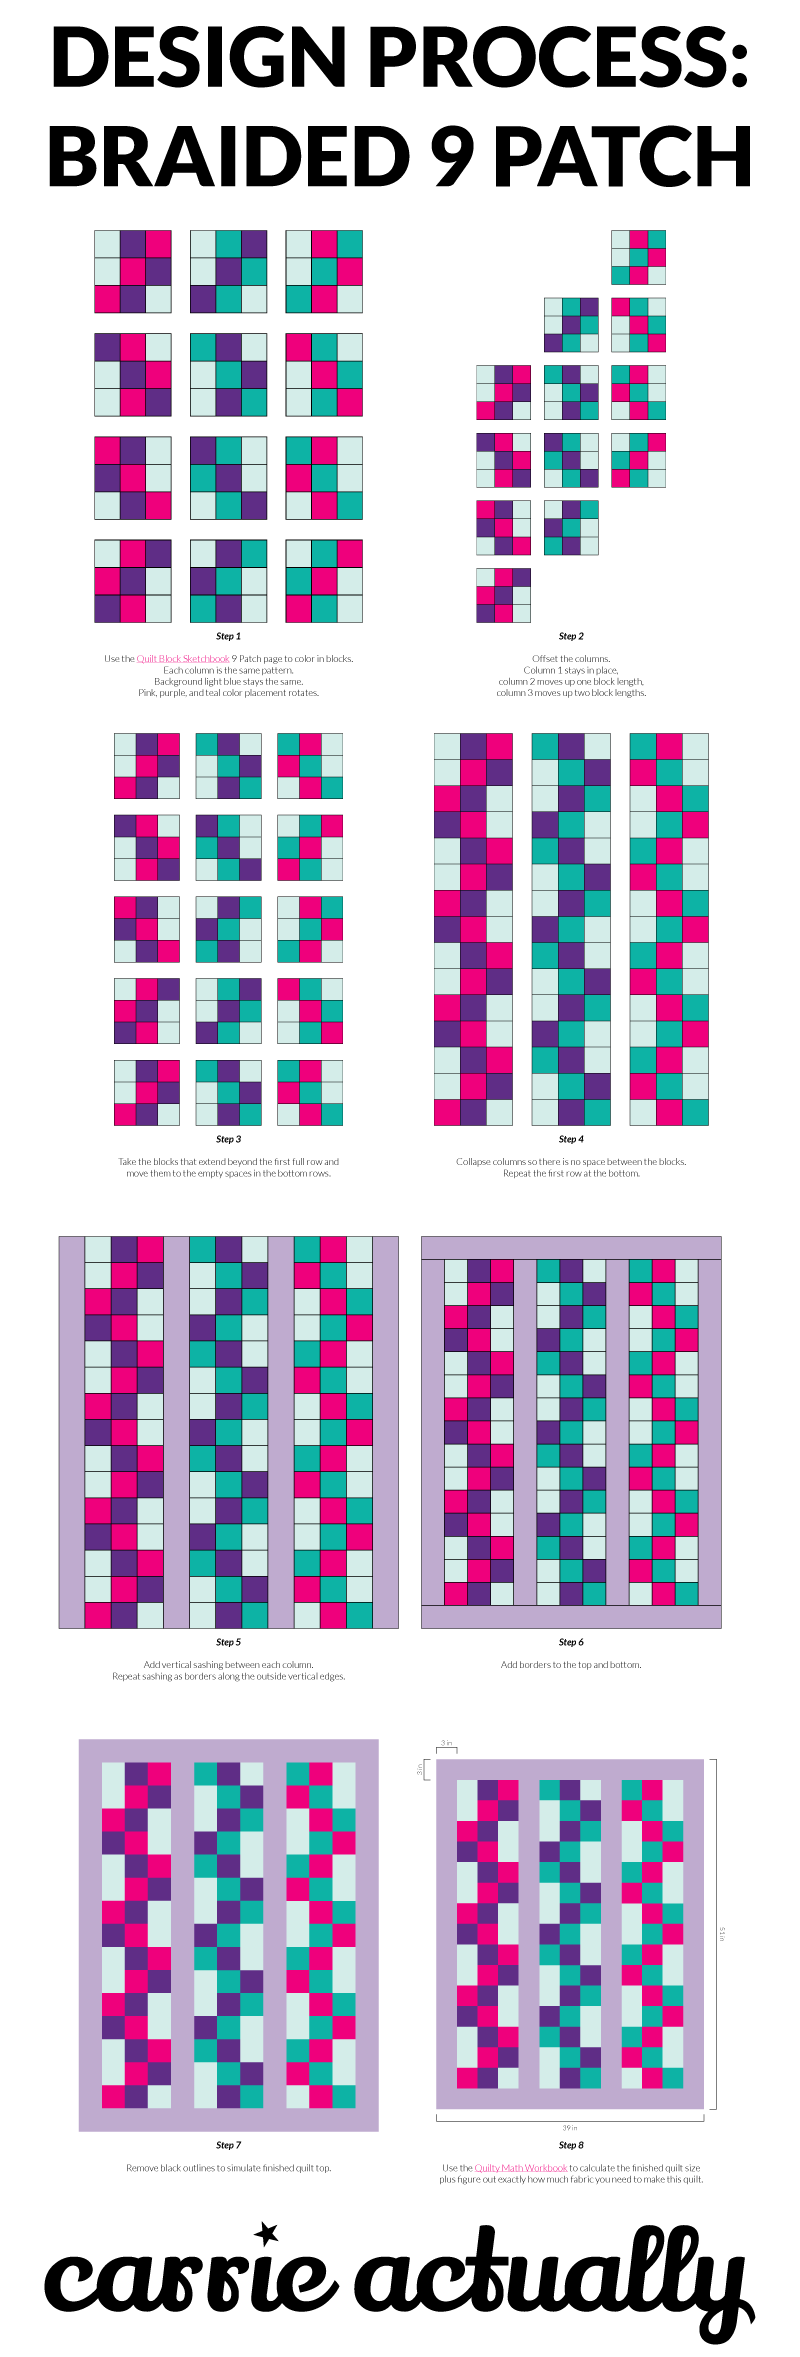
In this post, I'm going to show you step by step how I start with the Quilt Block Sketchbook to color in some simple squares and turn those squares into a complete quilt top design.
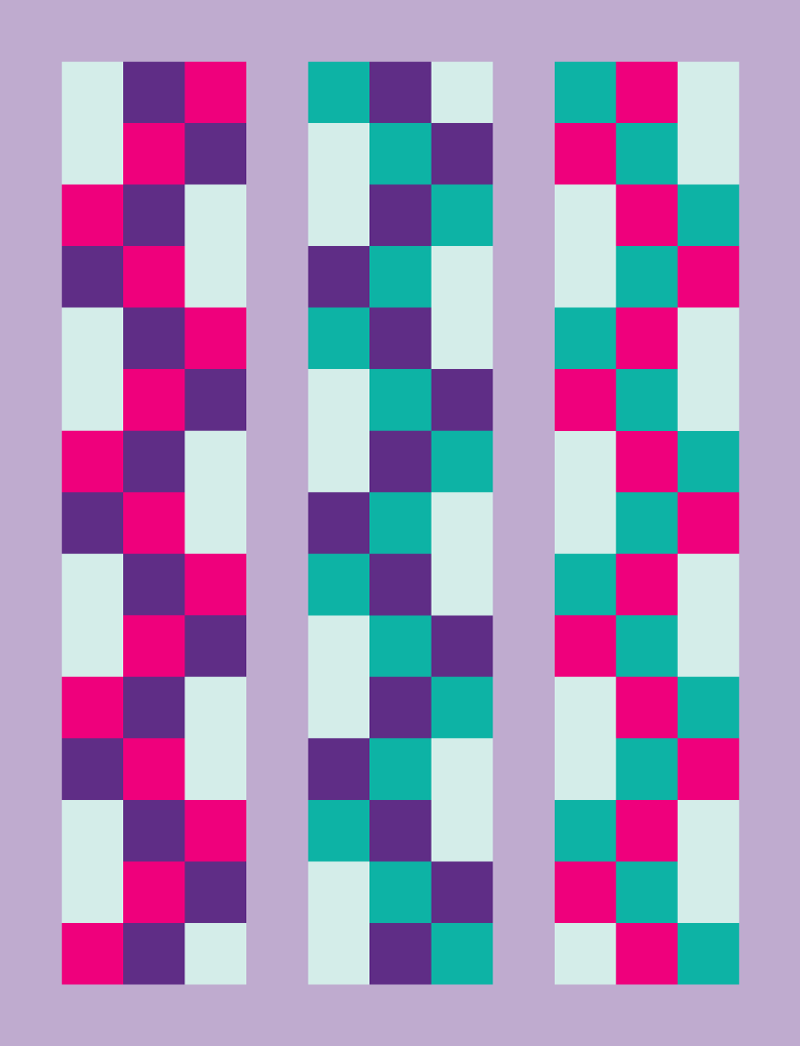
Step 1
Use the Quilt Block Sketchbook 9 Patch page to color in blocks. Each column is the same pattern. Background light blue stays the same. Pink, purple, and teal color placement rotates.

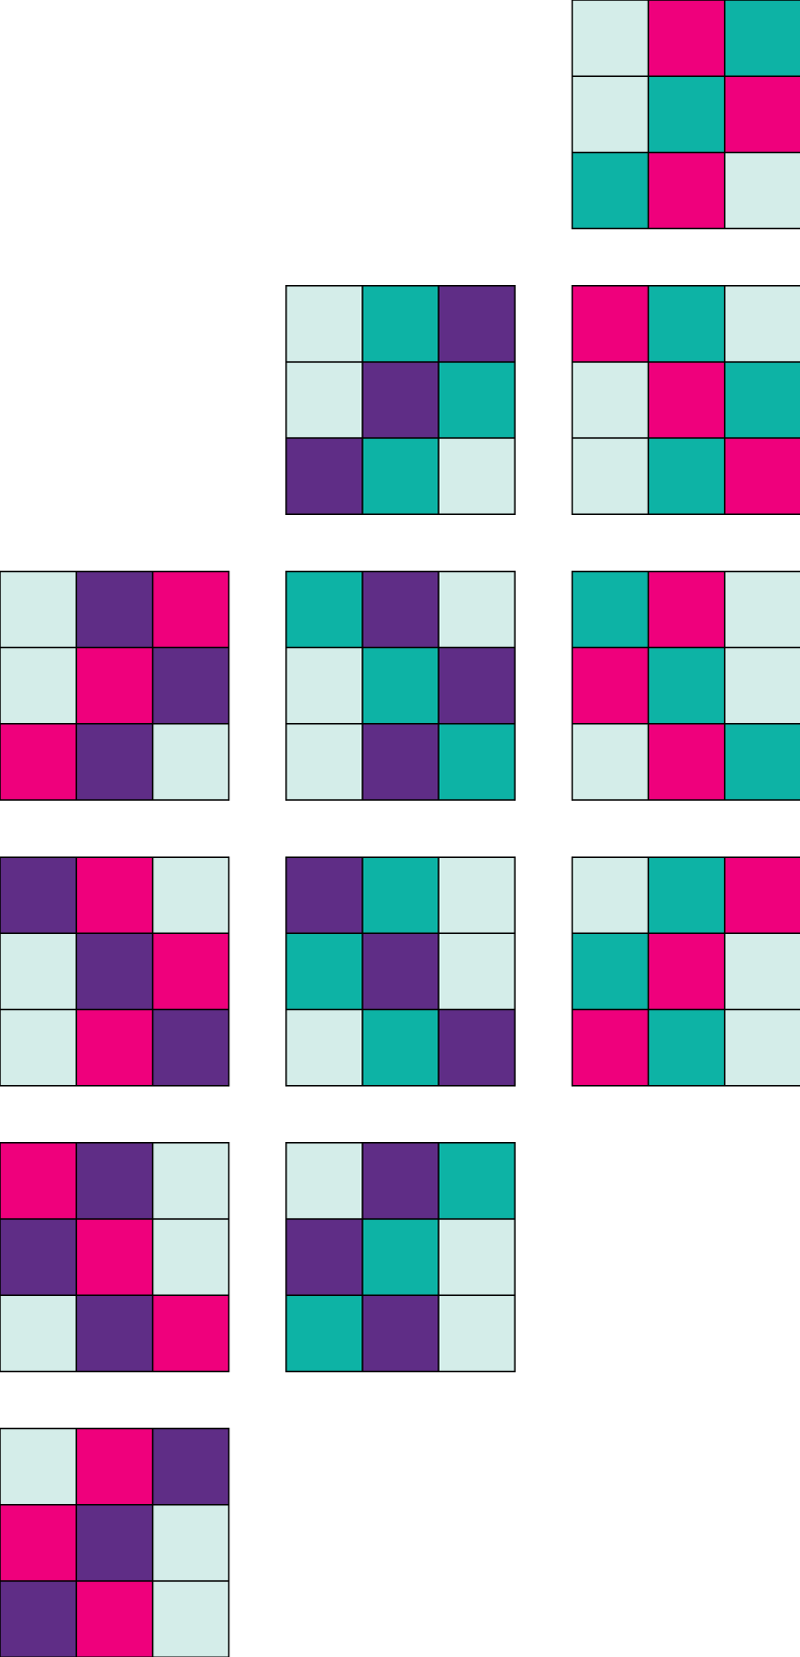
Step 2
Offset the columns. Column 1 stays in place, column 2 moves up one block length, column 3 moves up two block lengths.
Step 3
Take the blocks that extend beyond the first full row and move them to the empty spaces in the bottom rows.

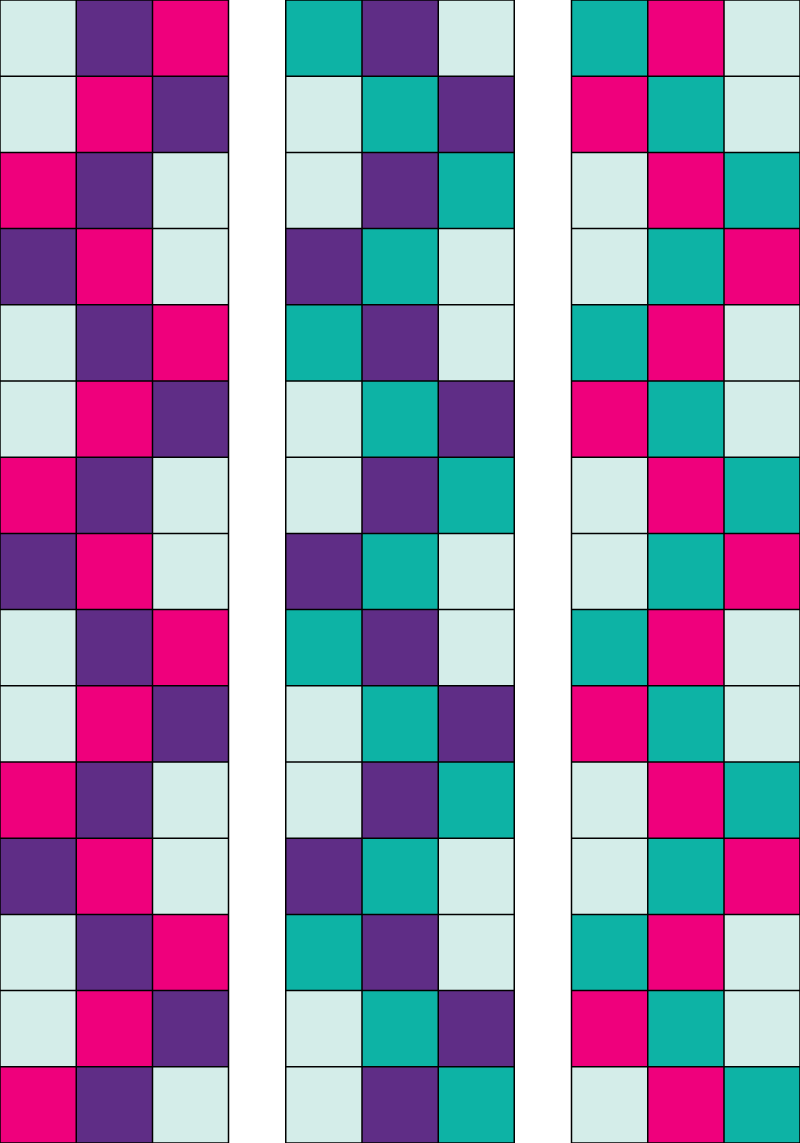
Step 4
Collapse columns so there is no space between the blocks. Repeat the first row at the bottom.
Step 5
Add vertical sashing between each column. Repeat sashing as borders along the outside vertical edges.

Step 6
Add borders to the top and bottom.

Step 7
Remove black outlines to simulate finished quilt top.
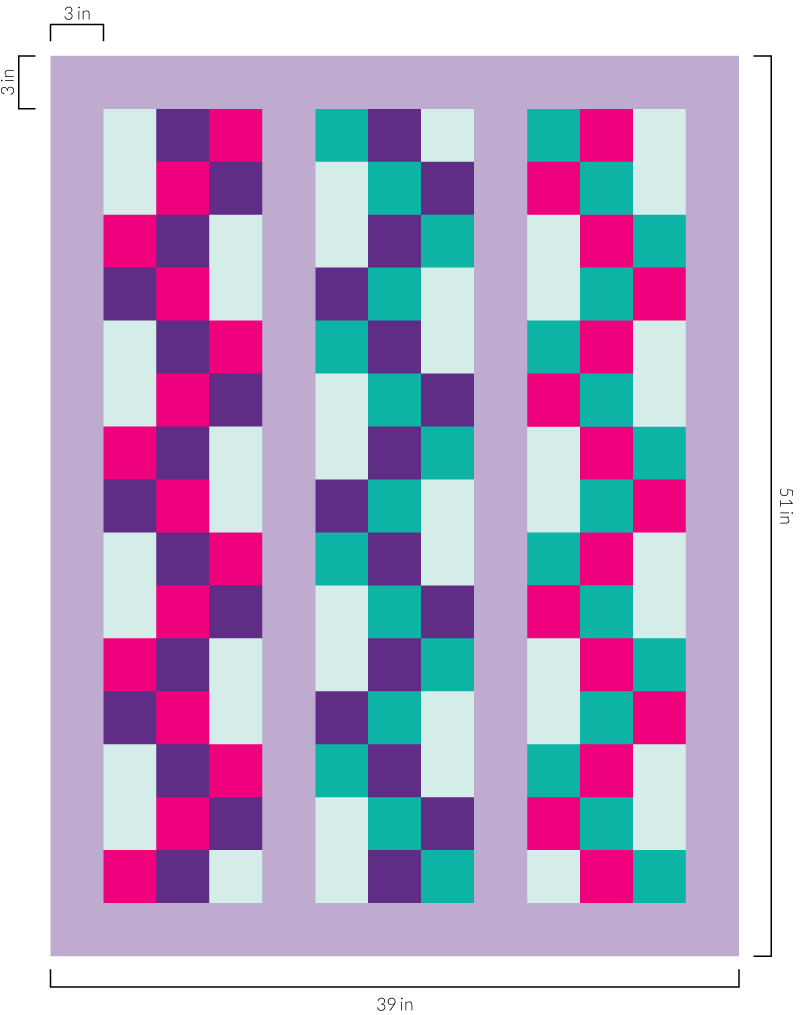
Step 8
Use the Quilty Math Workbook to calculate the finished quilt size plus figure out exactly how much fabric you need to make this quilt.